

Hello, future CS champions!
Have you ever wondered how an app like GitHub can instantly let you know when new code is pushed? Or how a payment platform can automatically notify an online store after a successful transaction? All of this happens instantly, without you having to manually check every single time.
Well, one of the main "brains" behind the magic of real-time communication between applications is the Webhook. In this tutorial, we will take a deep dive into Getting to Know Webhooks: How They Differ from Regular REST APIs and When to Use Them. We'll thoroughly break down the concept, compare it to the REST APIs you might be more familiar with, and most importantly, cover when it's best to use them in your own projects. Ready? Let's begin our adventure!
What Is a Webhook? An Analogy to Make It Easy to Understand
Imagine you have a newspaper subscription. There are two ways you can get your news:
-
You go to the newsstand every morning to buy the latest newspaper. This is how a regular REST API works. You (as the client) must actively "ask" for information (make a request) from the server (the newsstand) every time you want to know if there is new news. If you forget or get lazy, you won't get any updates.
-
The newsagent delivers the latest newspaper straight to your doorstep every morning. This is a simple analogy for a Webhook. You don't need to actively ask. As soon as there is new news (the newspaper is published), the newsagent (the webhook sender server/application) will automatically "notify" or "deliver" that information straight to your address (your webhook endpoint).
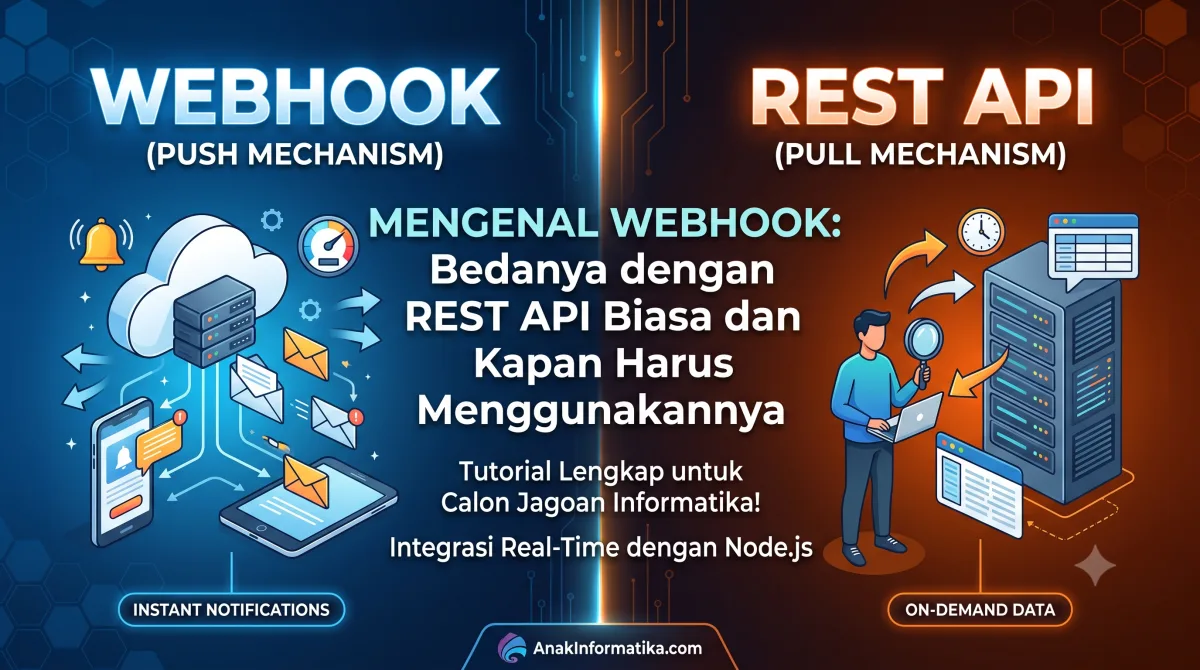
In technical terms, a Webhook is a mechanism where an application automatically sends data to a URL you specify (called an "endpoint" or "callback URL") whenever a specific event occurs. It is a "push" communication pattern, unlike the "pull" pattern used by most REST APIs. So, instead of constantly asking (polling) the server, "Is there an update? Is there an update?", the server simply "shouts" and sends the data as soon as a relevant event occurs.
💡 Tip: Webhooks are often called "Reverse APIs" or "Push APIs" because the communication flow is reversed. The client doesn't request; instead, it receives notifications from the server.
Webhook vs. Regular REST API: Which One Wins Out?
Webhooks and REST APIs are often confused with one another or assumed to be the same thing. In reality, they serve different functions and use-case scenarios. Let's break down the differences:
Regular REST API (Pull Mechanism)
-
Mechanism: You (the client) initiate requests (
GET,POST,PUT,DELETE) to the server to fetch or manipulate data. -
Communication Flow: Request $\rightarrow$ Response. It is synchronous by nature.
-
Example: Your e-commerce app calls a payment gateway API to check the payment status of a specific order. Or you call a weather API to get today's forecast.
-
Pros: Gives the client complete control over when and what data to retrieve. Ideal for fetching data on demand.
-
Cons: If you need real-time information, you have to poll (send periodic requests), which can consume server and network resources if done too frequently.
Webhook (Push Mechanism)
-
Mechanism: The server (service provider) initiates sending data (payload) to your registered URL whenever an event occurs.
-
Communication Flow: Event occurs $\rightarrow$ Server sends a notification (payload) to your Webhook endpoint. It is asynchronous by nature.
-
Example: A payment gateway sends a notification to your online store server after a payment succeeds. GitHub sends a notification to your CI/CD server every time new code is pushed.
-
Pros: Provides real-time updates, reduces server load by eliminating the need for polling, and is more efficient for event-driven notifications.
-
Cons: You must provide a publicly accessible and secure endpoint. Requires proper error handling and retry mechanisms on the sender's side.
Here is a comparison table for quick reference:
| Feature | Regular REST API | Webhook |
| Communication Mechanism | Pull (Client requests data) | Push (Server sends data) |
| Trigger | Request from Client | Event occurring on Server |
| Nature | Generally Synchronous | Generally Asynchronous |
| Example Use Case | Fetching product lists, user login, updating data | Payment notifications, shipping status updates, code push notifications |
| Real-time Efficiency | Less efficient (requires polling) | Highly efficient (instant) |
When Should You Use a Webhook?
Now that you understand the differences, you might wonder, "Okay, but when should I actually use a Webhook in my project?" Webhooks are extremely powerful for the following scenarios:
-
Real-time Notifications:
-
Payment Gateways: Receive instant notifications when a payment succeeds, fails, or is refunded.
-
E-commerce: Order status updates, out-of-stock alerts, or shipping notifications.
-
Chat/Messaging Apps: Receive new messages or user status events in real time.
-
-
CI/CD Integration (Continuous Integration/Continuous Deployment):
-
GitHub or GitLab can send webhooks to your CI/CD server (like Jenkins, CircleCI, TravisCI) whenever code is pushed, triggering automated build and deployment processes.
-
-
Automation Systems:
-
When new data enters a CRM, a webhook can trigger an automated email to the customer.
-
When a new file is uploaded to cloud storage, a webhook can trigger image resizing or file analysis.
-
-
Reducing Polling:
-
Instead of making continuous requests to check for changes, Webhooks allow the server to notify you only when a change occurs, saving bandwidth and system resources.
-
⚠️ Important Note: A Webhook is not a replacement for a REST API—they complement each other. You might use a REST API for basic CRUD operations (e.g., creating a user, fetching initial data) and a Webhook for real-time event notifications.
Practical Steps: Building a Simple Webhook Receiver
Now, let's build a simple application that acts as a Webhook receiver using Node.js and Express. We will also use ngrok to expose our local server to the internet so it can receive webhooks.
Prerequisites:
-
Node.js and npm: Make sure Node.js (LTS version recommended) and npm are installed on your system.
-
Basic understanding of HTTP and JSON: We will be working with HTTP requests and JSON payload formats.
-
ngrok: A great tool for exposing your local server to the internet. Download and install it here.
-
Terminal/Command Prompt: To run commands.
-
Postman or cURL: To simulate sending webhooks.
Step 1: Set Up the Node.js Project
Open your terminal or command prompt, then execute these commands:
# Create a new directory for our project
mkdir webhook-receiver
cd webhook-receiver

# Initialize the Node.js project
npm init -y

# Install Express and body-parser
# Express is a web framework for Node.js
# body-parser is middleware to parse request bodies
npm install express body-parser
Step 2: Create the Webhook Receiver Server (Node.js/Express)
Create a new file named index.js inside the webhook-receiver folder and paste the following code:
// index.js
const express = require('express');
const bodyParser = require('body-parser'); // Parses JSON/URL-encoded request bodies

const app = express();
const port = 3000; // The port our server will run on

// Middleware to parse JSON bodies from incoming requests
app.use(bodyParser.json());

// Main endpoint for receiving webhooks
app.post('/webhook', (req, res) => {
    console.log('--- Webhook Received! ---');
    console.log('Request Method:', req.method); // Displays HTTP method (POST)
    console.log('Request Path:', req.path);     // Displays request path (/webhook)
    console.log('Request Headers:', req.headers); // Displays all headers (useful for debugging)

    // The payload from the webhook sender will be in req.body
    // We use JSON.stringify to display the body in a clean, readable format
    console.log('Body Payload:', JSON.stringify(req.body, null, 2));

    // Crucial: Send a 200 OK response so the sender knows the webhook was received successfully.
    // Otherwise, the sender might attempt to retry sending it.
    res.status(200).send('Webhook received successfully!');
});

// Simple endpoint to verify the server is running
app.get('/', (req, res) => {
    res.send('Webhook Receiver Server is running smoothly!');
});

// Start the server on the specified port
app.listen(port, () => {
    console.log(`Webhook receiver server is running at http://localhost:${port}`);
    console.log(`Ready to receive webhooks at http://localhost:${port}/webhook`);
});
Run your Node.js server:
node index.js
You should see output like this:
Webhook receiver server is running at http://localhost:3000
Ready to receive webhooks at http://localhost:3000/webhook
Step 3: Expose Your Local Server with ngrok
Your server is now running on localhost:3000, which means it is only accessible from your local machine. To receive webhooks from external services (such as GitHub, Stripe, or even Postman/cURL outside your local network), we need to expose it to the internet using ngrok.
Open a new terminal window (keep your Node.js server running in the previous terminal) and execute:
ngrok http 3000
ngrok will provide a public URL accessible from anywhere. Example output:
ngrok                                                                         (online)

Session Status                online
Account                       [your_account_name] (Plan: Free)
Version                       3.x.x
Region                        United States (us)
Web Interface                 http://127.0.0.1:4040
Forwarding                    https://a1b2-3c4d-5e6f-7890.ngrok-free.app -> http://localhost:3000
Forwarding                    http://a1b2-3c4d-5e6f-7890.ngrok-free.app -> http://localhost:3000

Connections                   ttl     opn     rt1     rt5     p50     p90
                              0       0       0.00    0.00    0.00    0.00
Look for the Forwarding line containing https://.... This is the public URL you will use to receive webhooks. Copy this URL (e.g., [https://a1b2-3c4d-5e6f-7890.ngrok-free.app](https://a1b2-3c4d-5e6f-7890.ngrok-free.app)).
Step 4: Simulate Sending a Webhook
Now, let's simulate sending a webhook payload to our ngrok URL by issuing a POST request to https://[YOUR_NGROK_URL]/webhook containing a JSON payload.
Using cURL:
Open another terminal window and run the following command (replace [YOUR_NGROK_URL] with your actual ngrok URL):
curl -X POST \
     -H "Content-Type: application/json" \
     -d '{
           "event": "order_created",
           "data": {
             "order_id": "ORD12345",
             "customer_name": "CS Student",
             "amount": 150000,
             "status": "pending"
           },
           "timestamp": "2023-10-27T10:00:00Z"
         }' \
     https://a1b2-3c4d-5e6f-7890.ngrok-free.app/webhook
Using Postman:
-
Create a new request.
-
Set the HTTP method to
POST. -
Enter the URL:
https://[YOUR_NGROK_URL]/webhook. -
Navigate to the
Bodytab, selectraw, and set the format toJSON. -
Enter the same JSON payload as in the cURL example above.
-
Click Send.
Expected Output:
After sending the request, look back at the terminal window where your Node.js server is running. You will see output similar to this:
Webhook receiver server is running at http://localhost:3000
Ready to receive webhooks at http://localhost:3000/webhook
--- Webhook Received! ---
Request Method: POST
Request Path: /webhook
Request Headers: {
  "host": "a1b2-3c4d-5e6f-7890.ngrok-free.app",
  "user-agent": "curl/7.88.1", // Or PostmanRuntime/7.32.3 if using Postman
  "accept": "*/*",
  "content-type": "application/json",
  "content-length": "194",
  "x-forwarded-for": "xxx.xxx.xxx.xxx", // Sender's IP address
  "x-forwarded-proto": "https",
  "x-forwarded-host": "a1b2-3c4d-5e6f-7890.ngrok-free.app"
}
Body Payload: {
  "event": "order_created",
  "data": {
    "order_id": "ORD12345",
    "customer_name": "CS Student",
    "amount": 150000,
    "status": "pending"
  },
  "timestamp": "2023-10-27T10:00:00Z"
}
Congratulations! You have successfully built and tested your own Webhook receiver. The JSON payload sent to the endpoint now appears in your Node.js server logs. In a production application, you would process this req.body (e.g., saving data to a database, triggering emails, or executing business logic).
Best Practices & Tips for Implementing Webhooks
While webhooks are efficient, there are key practices to keep in mind to ensure your implementation remains secure and robust:
-
Respond Quickly:
When receiving a webhook, immediately return an
HTTP 200 OKresponse. Heavy business logic (such as processing database entries or sending emails) should be executed asynchronously in the background (e.g., using a message queue) after sending the 200 response. This prevents timeouts on the sender's end and stops unnecessary retries. -
Endpoint Security:
-
Enforce HTTPS: Always require HTTPS for webhook endpoints to ensure data in transit is encrypted.
-
Signature Verification: Many providers (e.g., Stripe, GitHub) attach a custom header containing a digital signature of the payload. Verify this signature to ensure the webhook originated from a trusted source and was not altered in transit.
-
Secret Tokens: Some services let you configure a secret token. This token is sent in the request header so your server can validate it.
-
IP Whitelisting: When feasible, restrict access to your webhook endpoints so they only accept traffic from known provider IP ranges.
-
-
Idempotency:
Design your webhook handler to be idempotent. If the same webhook payload is delivered multiple times (due to sender retries or network issues), it should not cause unintended side effects (e.g., duplicate charges or records). Use a unique event ID from the payload to detect and discard duplicate events.
-
Error Handling & Retries:
Webhook providers usually implement retry policies if your endpoint fails to return a
200 OK. Understand their retry rules and ensure your application handles duplicate deliveries gracefully. -
Logging and Monitoring:
Log every incoming webhook payload and header. Detailed logs are invaluable for debugging issues and auditing historical events.
-
Payload Validation:
Always validate incoming payload structures before using them. Never blindly trust external data.
💡 Tip: Tools like webhook.site allow you to test outgoing webhooks without setting up a local server—ideal for quickly inspecting payload structures sent by third-party services.
Conclusion
Congratulations! You now have a solid understanding of Webhooks, how they differ from regular REST APIs, and when to use them. Webhooks are a powerful tool for building reactive, real-time integrated applications that conserve system resources and deliver a better user experience.
While REST APIs remain the backbone of client-server interaction, Webhooks serve as the perfect complement for event-driven scenarios. Knowing when and how to leverage both will enable you to design far more efficient, modern software architectures.
Don't hesitate to start experimenting with webhooks in your own projects. Try integrating them with everyday services like GitHub, Trello, or payment platforms. Practice is key to mastering the technology!
Have any questions, interesting experiences, or additional tips about webhooks? Share them in the comments below! Let's learn and grow together here at AnakInformatika!