

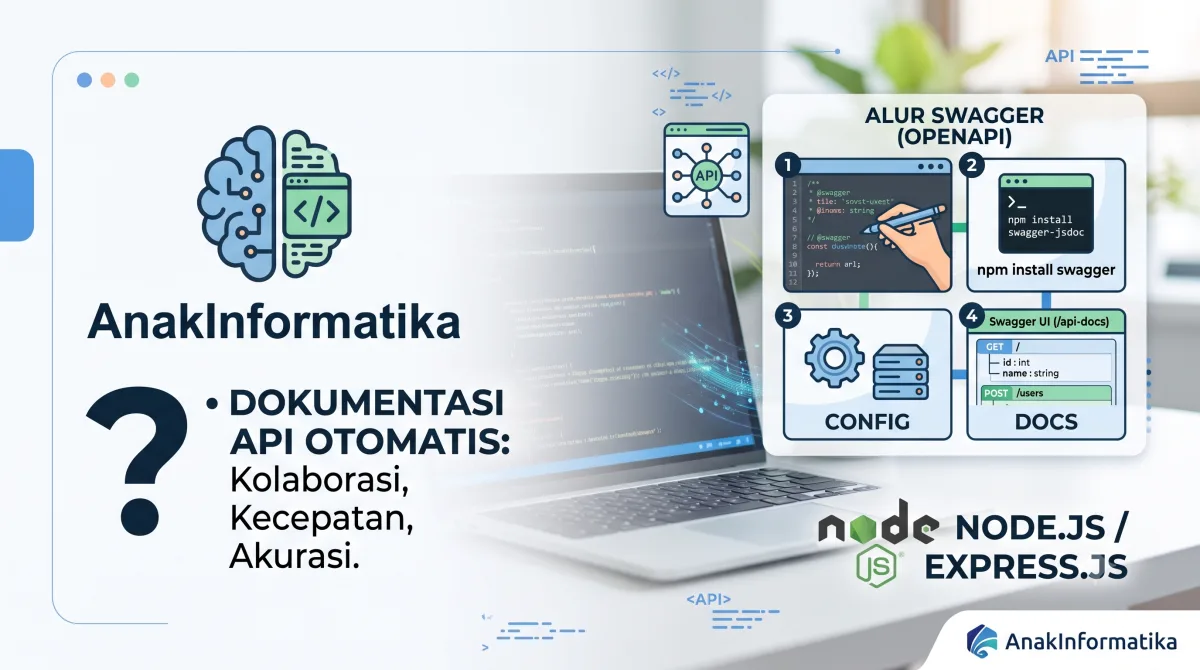
Hello, future skilled developers of AnakInformatika!
Have you ever felt frustrated and wasted time trying to build clean, automated API documentation without typing everything manually one by one? Honestly, this process is often a nightmare for many developers. We spend so much energy coding, only to end up manually writing every single endpoint detail, parameter, request body, and response. On top of that, whenever there's a change in the API, the documentation often lags behind. As a result, the frontend or mobile teams get confused, and the overall development process slows down.
Imagine this: you are constructing a magnificent skyscraper. Every floor, every room, every pipe, and every cable must be meticulously planned. API documentation is just like the blueprint of your digital building. Without a clear, accurate, and easily accessible blueprint, the project can turn into chaos. The architects (backend team) will struggle to communicate with the contractors (frontend/mobile team), and the final result might fail to meet expectations.
Well, in this tutorial, we will learn how to overcome this classic problem. We will harness the power of modern tools to generate clean and automated API documentation. Not only automated, but also interactive and accessible directly from your browser. Ready? Let's get started!
Why Is Automated API Documentation So Important?
You might ask, "Is API documentation really that important? Can't we just ask the backend developers directly?" Hold on a second. There are several compelling reasons why good API documentation is crucial:
-
Efficient Team Collaboration: The frontend team, mobile team, or even other backend developers can immediately understand how the API works without constantly asking questions. They can "self-serve" information.
-
Faster Development: With clear documentation, API integration becomes faster and less error-prone. Other teams won't have to guess the correct data formats or endpoints.
-
Accuracy and Consistency: Automated documentation generated directly from code tends to be more accurate and consistent compared to manually written docs. When the code changes, the docs update along with it.
-
New Developer Onboarding: New developers can adapt to the existing codebase and API much faster because all the information is neatly available.
-
Better Code Quality: The process of documenting APIs automatically encourages us to write more structured and understandable code.
For this tutorial, we will focus on using a combination of the OpenAPI Specification (OAS), commonly known as Swagger, along with swagger-jsdoc and swagger-ui-express in a Node.js environment with the Express.js framework. This is a popular and extremely powerful stack!
Prerequisites Before Getting Started
Before we start coding, make sure you have the following set up on your computer:
-
Node.js (LTS version): Make sure Node.js is installed. You can download it from its official website.
-
npm or Yarn: These package managers are usually installed automatically alongside Node.js.
-
Basic Knowledge of JavaScript & Node.js: You should be familiar with JavaScript syntax and how Node.js works.
-
Basic Understanding of Express.js: You know how to create routes and run a simple Express application.
-
Code Editor: Visual Studio Code, Sublime Text, or any of your favorite code editors.
-
Terminal/Command Prompt: To run installation commands and the application.
Once all the prerequisites are met, let's jump into the most exciting part!
Practical Steps to Create Automated API Documentation
We will build a simple Express.js application with a few endpoints, then integrate Swagger so the documentation is generated automatically.
Step 1: Initialize the Express.js Project
First, create a new folder for our project and initialize it as a Node.js project:
# Create project folder
mkdir my-api-docs
cd my-api-docs

# Initialize Node.js project
npm init -y

# Install Express.js
npm install express
After that, create an app.js file inside the my-api-docs folder and add the following simple Express.js code:
// app.js

const express = require('express'); // Import Express framework
const app = express(); // Initialize Express app
const PORT = process.env.PORT || 3000; // Define port, default to 3000

// Middleware for parsing JSON request body
app.use(express.json());

// First endpoint: GET /
app.get('/', (req, res) => {
    res.send('Welcome to the AnakInformatika API!');
});

// Second endpoint: GET /users
app.get('/users', (req, res) => {
    const users = [
        { id: 1, name: 'Budi Santoso', email: 'budi@example.com' },
        { id: 2, name: 'Siti Aminah', email: 'siti@example.com' }
    ];
    res.json(users); // Send array of users in JSON format
});

// Third endpoint: POST /users
app.post('/users', (req, res) => {
    const newUser = req.body; // Extract new user data from request body
    if (!newUser || !newUser.name || !newUser.email) {
        return res.status(400).json({ message: 'Name and email are required.' });
    }
    newUser.id = Math.floor(Math.random() * 1000) + 3; // Assign a random ID
    res.status(201).json({ message: 'User added successfully', user: newUser }); // Send success response
});

// Run the server
app.listen(PORT, () => {
    console.log(`Server running at http://localhost:${PORT}`);
});
Try running the server with node app.js. You can access http://localhost:3000, http://localhost:3000/users (GET), and test the POST endpoint using Postman or a similar tool.
Step 2: Install Swagger-JSDoc and Swagger-UI-Express
Now, it's time to install the packages that will help us generate the automated documentation:
npm install swagger-jsdoc swagger-ui-express
-
swagger-jsdoc: This library reads custom JSDoc comments written in our code and converts them into an OpenAPI specification (JSON/YAML). -
swagger-ui-express: This library provides an interactive web-based UI to display the generated OpenAPI documentation.
Step 3: Configure Swagger in Your Project
We need to instruct swagger-jsdoc on where to find our documentation comments and supply basic info about our API. Add the following code near the top of your app.js file (or in a separate configuration file like swaggerConfig.js).
For simplicity, let's keep it in app.js for now:
// app.js (continued from previous code)

const express = require('express');
const swaggerJsdoc = require('swagger-jsdoc'); // Import swagger-jsdoc
const swaggerUi = require('swagger-ui-express'); // Import swagger-ui-express
const app = express();
const PORT = process.env.PORT || 3000;

app.use(express.json());

// --- Swagger Configuration ---
const swaggerOptions = {
    swaggerDefinition: {
        openapi: '3.0.0', // OpenAPI Specification version
        info: {
            title: 'AnakInformatika API Documentation', // API title
            version: '1.0.0', // API version
            description: 'API documentation for learning how to build automated docs at AnakInformatika', // API description
            contact: {
                name: 'AnakInformatika Team',
                url: 'https://anakinformatika.com',
                email: 'hello@anakinformatika.com',
            },
        },
        servers: [ // List of servers where the API is deployed
            {
                url: `http://localhost:${PORT}`,
                description: 'Development server',
            },
        ],
    },
    apis: ['./app.js'], // Path to files containing API JSDoc comments. Can also be './routes/*.js'
};

const swaggerSpec = swaggerJsdoc(swaggerOptions); // Generate Swagger spec from options

// Endpoint to serve Swagger UI documentation
app.use('/api-docs', swaggerUi.serve, swaggerUi.setup(swaggerSpec));

// --- Existing API Endpoints ---
// ... (API endpoint code from Step 1)
Tip: The
apisproperty inswaggerOptionsis important! It tellsswagger-jsdocwhich files to inspect for JSDoc comments to build the documentation. If you split routes across multiple files in aroutes/directory, you can set it to'./routes/*.js'.
Step 4: Add JSDoc Comments to API Endpoints
This is the core of creating automated and clean API documentation. We add special JSDoc comments right above each endpoint. These comments will be parsed by swagger-jsdoc to assemble the OpenAPI specification.
Let's update app.js with JSDoc annotations:
// app.js (continued from previous code)

// ... (Imports and Swagger configuration above)

// Middleware for parsing JSON request body
app.use(express.json());

// First endpoint: GET /
/**
 * @swagger
 * /:
 *   get:
 *     summary: Retrieve welcome message from the API
 *     tags: [General]
 *     responses:
 *       200:
 *         description: Welcome message received successfully
 *         content:
 *           text/plain:
 *             schema:
 *               type: string
 *               example: Welcome to the AnakInformatika API!
 */
app.get('/', (req, res) => {
    res.send('Welcome to the AnakInformatika API!');
});

// Second endpoint: GET /users
/**
 * @swagger
 * /users:
 *   get:
 *     summary: Retrieve a list of all users
 *     tags: [Users]
 *     responses:
 *       200:
 *         description: List of users retrieved successfully
 *         content:
 *           application/json:
 *             schema:
 *               type: array
 *               items:
 *                 $ref: '#/components/schemas/User' # Referencing the User schema defined below
 */
app.get('/users', (req, res) => {
    const users = [
        { id: 1, name: 'Budi Santoso', email: 'budi@example.com' },
        { id: 2, name: 'Siti Aminah', email: 'siti@example.com' }
    ];
    res.json(users);
});

// Third endpoint: POST /users
/**
 * @swagger
 * /users:
 *   post:
 *     summary: Add a new user
 *     tags: [Users]
 *     requestBody:
 *       required: true
 *       content:
 *         application/json:
 *           schema:
 *             $ref: '#/components/schemas/UserInput' # Referencing UserInput schema
 *     responses:
 *       201:
 *         description: User added successfully
 *         content:
 *           application/json:
 *             schema:
 *               type: object
 *               properties:
 *                 message:
 *                   type: string
 *                   example: User added successfully
 *                 user:
 *                   $ref: '#/components/schemas/User'
 *       400:
 *         description: Invalid request body
 *         content:
 *           application/json:
 *             schema:
 *               type: object
 *               properties:
 *                 message:
 *                   type: string
 *                   example: Name and email are required.
 */
app.post('/users', (req, res) => {
    const newUser = req.body;
    if (!newUser || !newUser.name || !newUser.email) {
        return res.status(400).json({ message: 'Name and email are required.' });
    }
    newUser.id = Math.floor(Math.random() * 1000) + 3;
    res.status(201).json({ message: 'User added successfully', user: newUser });
});

// --- Define Schemas for Request/Response Bodies ---
/**
 * @swagger
 * components:
 *   schemas:
 *     User:
 *       type: object
 *       required:
 *         - id
 *         - name
 *         - email
 *       properties:
 *         id:
 *           type: integer
 *           description: Unique user ID
 *           example: 1
 *         name:
 *           type: string
 *           description: User's full name
 *           example: Budi Santoso
 *         email:
 *           type: string
 *           format: email
 *           description: User's email address
 *           example: budi@example.com
 *     UserInput:
 *       type: object
 *       required:
 *         - name
 *         - email
 *       properties:
 *         name:
 *           type: string
 *           description: User's full name
 *           example: Budi Santoso
 *         email:
 *           type: string
 *           format: email
 *           description: User's email address
 *           example: budi@example.com
 */

// Run the server
app.listen(PORT, () => {
    console.log(`Server running at http://localhost:${PORT}`);
    console.log(`API Documentation available at http://localhost:${PORT}/api-docs`); // Docs URL info
});
Important Note: Make sure the JSDoc comments are placed directly above the route declaration (e.g.,
app.get(...)orrouter.post(...)).swagger-jsdocsearches for comments in those positions. Pay close attention to indentation and YAML syntax inside comments, as it is very strict.
Common JSDoc tags used:
-
@swagger: Signals that this comment block contains Swagger/OpenAPI specifications. -
/users:: Defines the endpoint path. -
get:orpost:: Defines the HTTP method. -
summary:: A brief overview of the endpoint's functionality. -
tags:: Used to group endpoints within the documentation UI. -
responses:: Defines various HTTP responses (e.g.,200 OK,201 Created,400 Bad Request). -
description:: Provides a detailed description. -
content:: Specifies response content types (e.g.,application/json). -
schema:: Data structure for request or response bodies. Use$refto reference reusable schemas defined incomponents/schemas. -
requestBody:: Defines the structure of payload data sent via methods like POST/PUT. -
components/schemas:: A centralized location to define data structures (models) reused across endpoints. This keeps documentation clean and adheres to the DRY (Don't Repeat Yourself) principle.
Step 5: Integrate Swagger UI into the Express App
We already set this up in Step 3 using this line:
app.use('/api-docs', swaggerUi.serve, swaggerUi.setup(swaggerSpec));
This creates a new endpoint located at /api-docs. When accessing this URL in a browser, swagger-ui-express serves an interactive web interface displaying the API documentation derived from the generated Swagger spec.
Step 6: Run the Application and View Your Documentation!
Now, launch your Node.js app once more:
node app.js
You will see output in your terminal similar to:
Server running at http://localhost:3000
API Documentation available at http://localhost:3000/api-docs
Open your browser and navigate to http://localhost:3000/api-docs. Voila! You will see a clean and interactive Swagger UI interface detailing all defined endpoints.
You can click on any endpoint to expand its details, send real requests directly from the UI using the "Try it out" feature, and view sample responses. This proves how straightforward it is to generate clean, automated API documentation without manually typing out every single detail!
Best Practices & Tips for Better API Documentation
To make your documentation even more effective, keep these practices in mind:
-
Consistency is Key: Always maintain uniform formatting across JSDoc comments. Use standard patterns for parameter names, descriptions, and examples to improve readability and maintainability.
-
Leverage Schemas: As shown with
components/schemas/User, utilize reusable schemas for complex data structures. This keeps documentation DRY and easy to manage. -
Use Tags Wisely: Categorize endpoints with relevant tags (e.g.,
[Users],[Products],[Auth]). This makes navigation much simpler, especially in large APIs. -
API Versioning: If your API supports versioning (e.g.,
v1,v2), ensure the documentation reflects this. You can separate JSDoc files per version or use path prefixes. -
Security: For endpoints requiring authentication, define security schemes in Swagger (e.g., JWT, OAuth2, API Keys). This enables developers to test protected routes directly in the UI. Be mindful not to leak sensitive details in public documentation.
-
Keep Docs Updated: Automated docs still require maintenance! Keep JSDoc comments aligned with code updates. Outdated documentation is often worse than no documentation at all.
-
Automated Validation: Libraries like
express-validatoror JSON Schema validators can be integrated to automatically validate incoming request bodies against the schemas defined in Swagger, ensuring consistency between docs and code implementation.
Conclusion
Congratulations! You have successfully learned how to generate clean and automated API documentation using Node.js, Express, swagger-jsdoc, and swagger-ui-express without typing everything manually. This is an invaluable skill in modern software engineering.
By adopting this workflow, you save time, improve API quality, accelerate team collaboration, and make life much easier for fellow developers (and your future self!).
Feel free to experiment further by adding more endpoints and exploring additional Swagger/OpenAPI features. It's a small upfront investment that yields huge long-term dividends.
Have questions or additional tips on API documentation? Share your thoughts in the comment section below! We look forward to your contributions!